LED Cat ears

RGB LED lit kitty ears.

The ears are made of out laser cut latex and EVA foam. Magnets embedded to easily attach them to different mounting devices.

Lighting is done with WS2812 (neopixels) RGB LED's. Lights are controlled with atTiny85 (adafruit trinket)

LED ears blue

Here is the battery pack and the inside of the ears. Used LED strip for simplicity flexible and also keeps any copper elements away from the latex inside the silicone case of the LED strip.


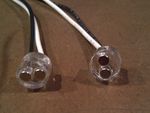
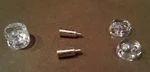
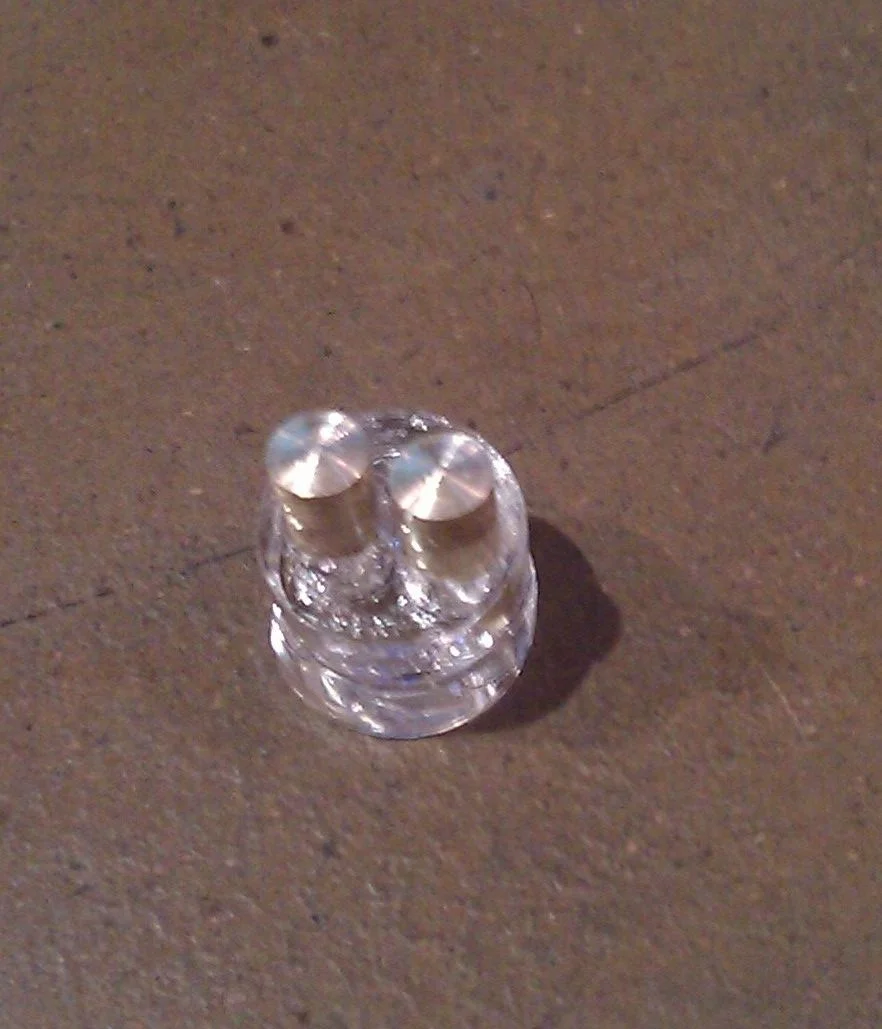
Battery pack is wrapped in leather. Hand stitched with 3 pin molex connector and a magnet for stabilization. inside the pack is a trinket, 500 mah battery and charger. Controls are power switch, tactile button and simple vibration sensor. This allows selecting of modes and for light patterns to react to movement.

Posted on May 24, 2015 .

Back lit 8-bit latex lace

Here i have created a laser cut latex t-shirt. The tottenkitten logo is back lit by a silicone diffuser that contains 3 ws2811 5mm through hole LEDs.

video of fire effect here: http://youtu.be/P-JUguqPv1o


LED backlit 8-bit lace

Controller, battery and charger:

Controller is an adafruit trinket; paired with Li-pol backpack charger. The can above the charger is a simple vibration sensor (spring in a can). Charger and trinket are connected with bent pin headers to create a simple bus bar for easy connection of power and ground wires.  Whole kit is wrapped in leather and riveted closed.

Trinket and charger

Controller pack and diffuser:

The controller pack closed up with rivets and magnets glued to the surface for easy mounting inside the top. The diffuser is silicone poured out onto plastic then pre-soldered LED's inserted while the silicone was still soft. extra pour on top to seal in the LEDs.

Diffuser and controller
Posted on February 3, 2015 .

Super Street Fire gloves

Super street fire is an interactive fire installation using motion sensing gloves that report data back to a gesture recognition program.

Here is a series of iterations of the SSF gloves:

2011

2011

2012

2012

2013

2013


Posted on October 7, 2014 .

30 min toilet paper holder

Today I made a quick and simple toilet paper holder.

I got sick of the toilet paper getting wet sitting on the counter so I decided to fix this problem. First I took some quick measurements and came up with a designed. The resulting CAD file is fairly simple, there is an outline in red layer that is completely cut through. There are also some cross lines (purple layer) that are scored on to mark where to bend.

Fresh out of the laser cutter I used a heat gun to soften it around the score marks. Both marks needed to be bent at 90°, luckily this is a very easy angle to get, I used the edge of my kitchen counter. After it was bent I gave it a few minutes to cool and then it was ready to be mounted on the wall.

The material used here is 1/4 inch clear acrylic, which is a good balance between strength and workability. I also considered using wood, but that would have needed more complicated joints.

Posted on June 21, 2014 .

Leather and EL Ribbon hood

Leather hood with EL ribbon trim diffused behind silicone and a scale maille arm. The full "Death" costume includes a latex top, neoprene skirt and laser cut LED scythe.

The hood electronics are fairly simple. EL-ribbon, Li-Pol battery with a Sparkfun charger and 3v EL wire inverter. The EL wire is rather inefficient compared to LEDs, a full charge of the 1200 mAh battery gives only about 6 hours of glow. The inverter also makes an annoying high pitched tone that is audible in quiet environments. For future wearable projects with lights I will only be using LEDs.

My Death costume @ anime north 2013

My Death costume @ anime north 2013

Costume in a different light

Costume in a different light

Posted on April 2, 2014 and filed under Clothing.

8-bit "Lace" Latex Corset Progress

This is a progress update on a latex "lace" corset. The pattern is made of tiny cut squares, luckily that was done using a laser cutter, not by hand. There are literally thousands of holes cut in this piece.

Currently this project is about 40 hours in, with much of that time being spent writing custom code to take any image and generate the files to be cut using the laser cutter. If something is worth doing it is worth writing code to do!

I hope to have finished pictures up of this shortly, but personally projects always take second place to client work.

Material details:

  • Custom steel boning front and back
  • 3/4’’ waist tape
  • Speed lace rings on back
  • Hook and eye closure on front
  • 1 mm metallic red latex (back)
  • .65 mm metallic pewter latex (front)

(The latex was purchased from sheetlatex.com)

Posted on May 28, 2012 and filed under Clothing.

ZATA OMM's Eight Ways From Mara (5 mins excerpts) choreographed by William Yong

ZATA OMM's Eight Ways From Mara (5 mins excerpts) choreographed by William Yong from Zata Omm on Vimeo.


Promotional excerpt from
Zata Omm's EIGHT WAYS FROM MARA

Performed by Heather Berry-MacPhail, Kate Franklin, Erika-Leigh Howard, Nicholas Melymuk and William Yong
Choreography by William Yong
Original Music by Andrea Rocca
Video Design by Elysha Poirier
Lighting Design by Rebecca Picherack
Props and headpieces by Carl Penny
Stage Management by Ainsley Kendrick
Video documentation edited by Thomas Nagy

Premiered on DanceWorks Mainstage as part of the Harbourfront Centre's NextSteps.

Eight Ways From Mara is originally 70 minutes long. This production was generously funded by Toronto Arts Council, Ontario Arts Council, DanceWorks and BMO Financial Group.

For more info please visit:
Zata Omm
zataomm.org

Yes I copied the vimeo page (am lazy). Is great to see my work in a professional production.

Posted on February 22, 2012 .

LED Corset

Some party shots of another creation, a moulded and laser cut and etched acrylic corset. The lighting comes from LEDs embedded in the acrylic. They are powered by two AA batteries and give a full night of glow.

Corset side with hexagonal top

Corset side with hexagonal top

Corset back

Corset back

Posted on December 2, 2011 and filed under Clothing.

Halloween Costume photos

With the passing of Halloween comes photos recovered from the party. I think I achieved the creepy cyborg look I was going for.

The clear plastic parts are acrylic laser cut from a sheet then moulded with heat and care. Blue LEDs are embedded and powered by a combination of Li-Pol (and AAA batteries for the older pieces.) My new go to power source is a 3.7v Li-Pol battery with a constant current driver. This allows me to simply stack LEDs in parallel with no series resistors.

Taken in the photo booth

Taken in the photo booth

Posted on November 4, 2011 and filed under Clothing.

Hexagon outfit

This kit was designed entirely with CAD software. Nothing fancy just take measurements and make curves. Basic pattern making skill here (need to work on that).

Free tools for this would be inkscape and open office spread sheet.

Process behind this is:

  • Make some sketch; in my case doodle a plan on some random scrap of paper
  • Take measurements
  • Use spread sheet to divide according to planned design
  • Draw it up in CAD
  • Export to laser and cut on paper
  • Test paper pieces for scale and fit (as well as one can test with paper)
  • Make adjustments and repeat
  • Cut latex

Assembly takes hours of gluing and random profanity before everything is neatly finished.

Optional things to do:

  • Lose sleep
  • Rush like hell
  • Meet deadline by a hair.

Hexagon pattern is a laser cut appliqué.

Cut using the Site 3 Laser cutter with latex sheeting from sheetlatex.com.


Model: Fenix TargaryenPhotographer & Make-up: Jonah Fheonix

Model: Fenix Targaryen

Photographer & Make-up: Jonah Fheonix

Also on my DeviantArt

Also on my DeviantArt

Posted on July 13, 2011 and filed under Clothing.

Mini Maker faire

Thanks to all who came to Toronto’s first mini Maker Faire. The response was amazing and encouraging. To see the look of confusion change to amazement was awesome. Seeing this repeatedly over two days really makes me think I have something. It’s not something that will ever sell to the masses; but those who after edgy wearable art do enjoy my creations. Photos of my stuff are located on my DeviantArt.

Posted on May 9, 2011 .

Mag connector

I'm currently working on development of my own magnetic power connector. This is to solve the problem of wanting to power lots of LEDs but without having batteries in every small thing. So far I have used disposable batteries, but I'd much rather be using lithium polymer (LiPo) batteries.

LiPo batteries are nice and small but costly and require a special charger. Given the requirement of limitations it is preferable to have a single larger battery that powers everything.

Okay so there is a bit of a problem when you have one battery but LEDs all over the place. Especially if those LEDs are embedded in parts of the costume that can be large or clumsy (wings) and need to be removed with ease. A magnetic connector can easily latch on and break with ease making quick removal simple.

For connivence when working with pieces of costume that might be hard to see while being worn I've designed the connector to only snap together when in the correct orientation. The colour code marks the direction of the magnet rather then the direction of current. This means all connectors are made the same.

I am using two 1/8’ neodymium magnets in each connector in a laser cut acrylic housing. The wires will be secured to the magnets with conductive epoxy (the photos here just show a dry fit.)

The connector housing is made in two parts one cut and etched for the wire, the second to fit the magnets. Brass pins made to align the halves when gluing.

Closed

Closed

Open

Open

Parts and pins

Parts and pins

Connector with pins

Connector with pins

Posted on March 22, 2011 .

Latex bracelet

I made some nifty new/old bracelets. They are new because I just made them but also old because it’s comes from forgotten design pulled from the black depths of my hard drive.  I cut three versions: latex, leather and neoprene.

The latex cut wonderfully (as it usually does), the leather and neoprene cut but not as nicely. The leather is thick moose hide. It can be cut but becomes rather burnt when trying to get all the way through the leather. The neoprene is also troublesome, It has a high carbon content (chemical resistant industrial grade) and I didn't care to put in the time to tune everything to get it to cut nicely.

The latex on is in the photo to the right.

The leather one has an aluminium insert.

The plan for the neoprene is a stainless plate.

Latex version with a simple black insert

Latex version with a simple black insert

Posted on November 10, 2010 .

Lasers are fun.

I recently joined a grate group called Site 3. The motivation was to use their laser engraving machine but i am also finding it awesome to get to know a smart, creative bunch of people.

Last night after an hour of testing and tuning I was able to cut sheet latex without cutting the tape backing.  The latex is to be an appliqué on a latex garment. The point of the tape backing is so that I can clean and glue in one piece and then just stick it down without any stretching or distortion.

The blue photo shows a test for glowing armour that I will attach to my boots. It is made from 1/4'' acrylic and each panel will have one blue LED embedded into it.

Honeycomb appliqué

Honeycomb appliqué

Boot armor test

Boot armor test

Posted on October 20, 2010 .

Tiny Gaming Rig

My latest project The Tiny Game machine is nearly complete. This bit of fun has been it the works for what seems like an age.

This great little game machine is built on a zotac mini-itx platform

  • LGA 775 GF9300
  • Intel Q8200; 4Gb RAM
  • OCZ Vertex 60Gb
  • Enermax Liberty DXX ELT500AWT 500w PSU
  • and the big one: Palit GeForce GTX 460 Sonic 1024MB

All of this crammed into a tiny Lian-Li PC-Q07 box.

First try at the on button: the GPU was up to 80c in minutes (quite expected). Next pulled off the side and flipped the case upside down. This brought the running temp down to 73c under load. finally i added 4x 4cm fans for intake and one blower at the top for exhaust and this brings the temp down to 61c under the same load.

Posted on September 14, 2010 .

Vac Bed Breathing Mask

For this breathing rig I started with a MSA Comfo classic half mask that I already had. This case worked out exceptionally well.

First thing was to remove all the hardware from the mask. This was quite simple just stretch the mask over the plastic parts and they pop right out.

The strap bracket is held in place with a single rubber pin. Just push this out of the strap bracket.

Now we have a nice rubber mask with three holes; one for a tube and two to plug.

For the plugs I dug out a hole saw and some acrylic scrap.

  • Made four circles;
  • sand them down (sharp edges galore from the hole saw).
  • Combine two circles with a Chicago screw and we have a plug 

For the breathing tube I used ½’’ id black vinyl tubing. This is a bit stiffer then I would like but I did not want it to crush under vacuum.

The pic here has the tube in directly; I added a right angle fitting so that things would fit better when in the bed. This worked well but does leak so I will be adding a latex gasket around the fitting to prevent air loss at this junction.

For the tube to exit the vac bed I decided to have it go through the frame.

Simply drilled two holes (hole saw) in the pvc frame to allow the tube to pass; then added a hole/gasket in the envelope of the bed (placed to match the frame).

MSA Comfo classic half mask (photo from MSA web page)

MSA Comfo classic half mask (photo from MSA web page)

Plugs made of acrylic scrap and Chicago screw.

Plugs made of acrylic scrap and Chicago screw.

Finished mask with tube and plug

Finished mask with tube and plug

Posted on August 4, 2010 .